Spending Goal
Campaigns
The Spending Goal feature is a dynamic pricing bar that provides certain pricing checkpoints to users. Users can complete these checkpoints and earn rewards!
For example, an e-commerce store owner can offer free shipping at a set price target of $250. If a user spends $250, then they will get free shipping!
With the BundleWise Spending Goal Bar, shop owners can offer discounts on products, free shipping, and free gifts based on their requirements. Furthermore, they can upsell products using this feature as well, or create multiple checkpoints based on their needs.
Creating the Spending Goal Bar Campaign
Before creating the campaign, make sure the plugin is installed. To create a Spending Goal campaign:
- Go to BundleWise > Campaigns from your Shopify Dashboard.
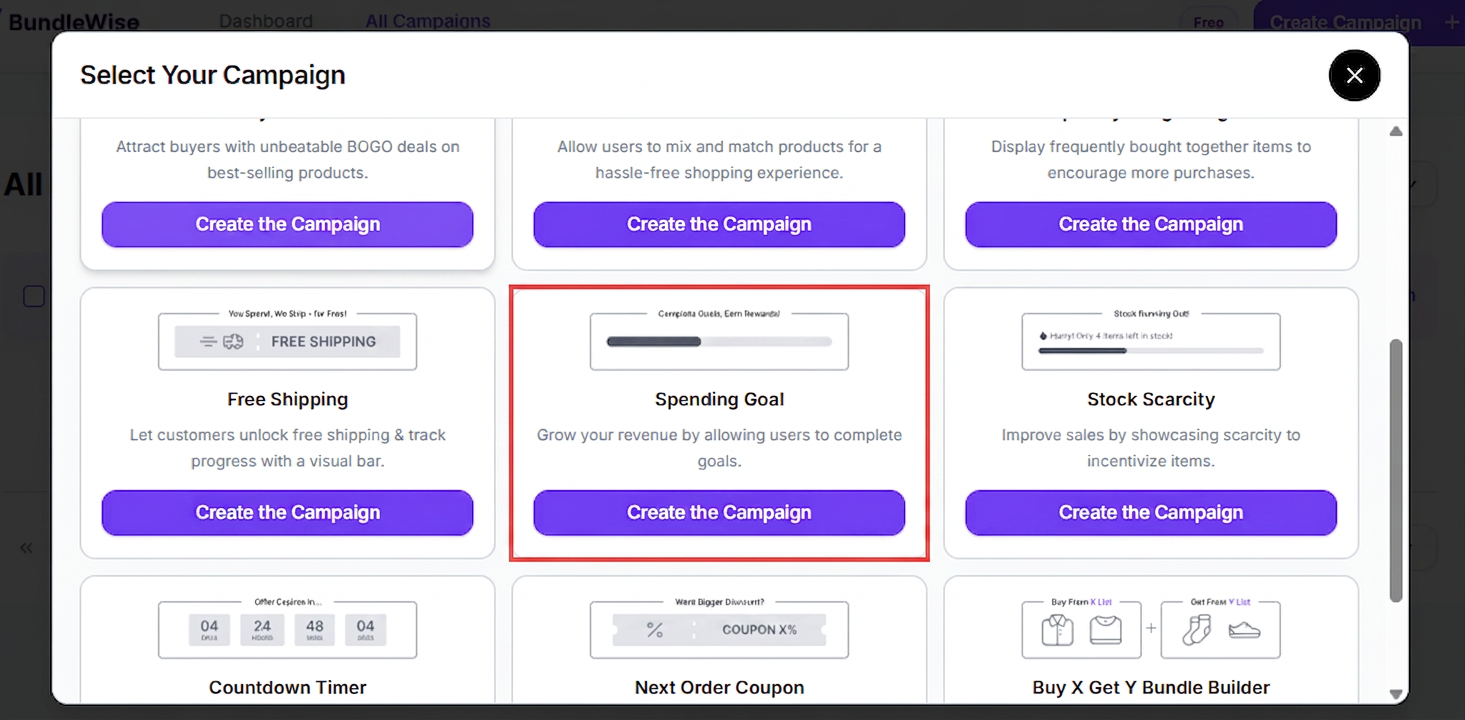
- Then click on the Create Campaign button.
- Find the Spending Goal campaign.
- Click the Create the campaign button to proceed.
Initial Campaign Setup
There are a couple of things you need to do before your spending goal campaign is fully ready.
Select the Pages Where You Want the Campaign to Run
The spending goal bar can currently run on:
- The Product Page
- The Cart Page
- Entire Site
You can enable or disable certain page combinations using the Product Page Status toggle. This is super helpful when running A/B testing on your Shopify store. Or you can only select certain pages from the very beginning.
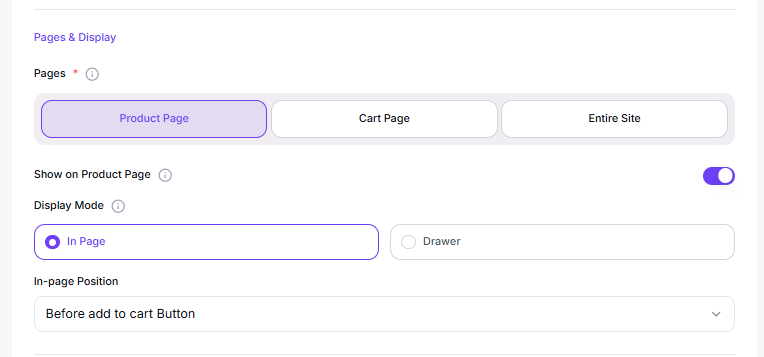
Spending Goal Bar Positioning
The spending goal can appear in either of the following two ways:
In-page Spending Goal Bar
The in-page positioning options will vary for different pages:
Appearance on the Product Page: The spending goal bar can appear at 3 different positions on the Shopify product page:
- Before add to cart Button
- After add to cart Button
- After single product summary
- Before single product
- After single product
Appearance on the Cart Page: The cart page appearance options are:
- Before cart table
- Before cart
- After cart table
- After cart
- Before Cart Total
- After Cart Total
- Proceed to Checkout
Appearance on the Site: You can make the spending goal bar appear on the entire site. Position it at the top of the page, the bottom of the page, or as a drawer. When showing it at the top or bottom on the entire site, it will appear as an in-line spending goal bar.
Please note that you need to add something to the cart for the spending goal bar to show up on the front end.
Spending Goal as a Drawer
If you wish to show the spending goal as a drawer, the positioning options will be the same for all the pages. You can position the spending goal drawer either at the top, bottom, left, or right on any desired page.
The campaign placement can be different for different pages — click each page and set it up to your needs. For example, you can set up a drawer on the cart page, while keeping an inline bar on the product page.
Essential Campaign Setup Toggles
- Display Goal Icon: Show icons for specific checkpoints on the spending goal bar.
- Display Confetti: Show confetti when a user completes their goals.

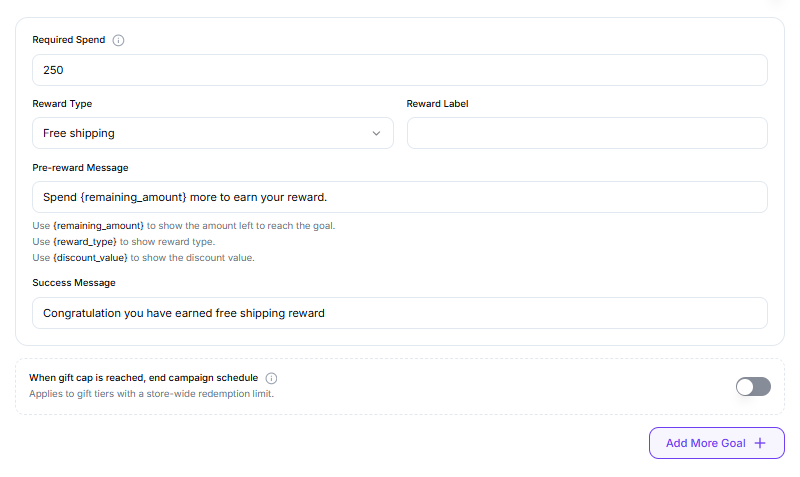
Spending Goal Bar Setup — Adding Rewards for Users
Setting up the spending goal bar is super easy with BundleWise. Here are the things you can configure for a custom spending goal bar:
- Required Spend: Set the spending amount target — how much a user has to spend to complete the goal.
- Reward Type: Choose between Free Shipping, Cash Discount (Fixed or Percentage), or a Gift item.
- Reward Label: Fill out the label users will see for the reward they're getting after completing a goal.
You can add multiple spending goal checkpoints. Just click the + Add New Goal button to add a new checkpoint.
Offering a Discount
Under Discount Value, set the discount amount. Then in the Discount Type setting:
- Percentage: Slash off a certain percentage from the user's cart amount.
- Fixed: Apply a fixed discount amount.
Offering Free Shipping
Select the Free Shipping option from the drop-down. You only need to add the reward label.
Offer Free Gift / Gifts
After you select the reward type as Gift Items:
- Select the items you want to offer as gifts.
- Under the Customer Gets section, select whether the user will get all the items or can pick a number from the total gifts available.
- Let users preview the gift items using the Gift Item View on Hover setting.
Example: if you offer 3 gift items and set Customer Gets to 2, the user will get to choose 2 items between the 3.
There's also an additional setting — Ultimate Goal Completion Note — where you can set a personalized message based on your needs.
Upselling Products
You can upsell products on the Spending Goal Bar. To do that:
- Enable the Display Upsell Products toggle.
- Select the products you want to offer for upselling.
- Select the discount amount and the discount type.
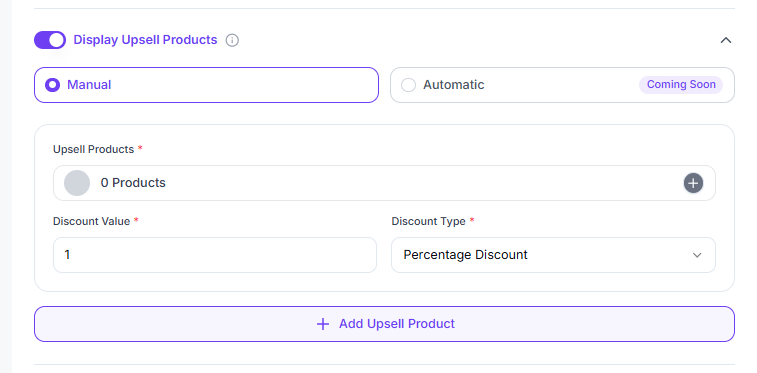
An automatic product upselling mechanism is coming later this year. You can also add extra upselling items as needed.
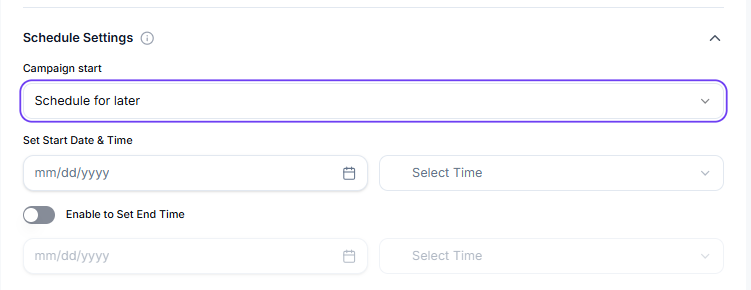
Scheduling Settings
You can schedule the spending goal campaign by setting start and end dates so the campaign runs within a certain time. Note that you need to enable the end-time settings using a toggle.